
Tales Ftom the Orient

Today I have made this card using printouts from the Debbi Moore Oriental Digital Collection.


This is how I made it.


I started with an A5 card blank. I made this one using a piece of A4 card folded in half.


I cut two matching pieces from the backing paper and stuck them in place like this.


Then I stuck the first layer of decoupage in place like this. You can use foam pads here if you wish but I prefer to put the first layer down flat.


Add foam pads to the next layer. You may think this is overkill but I don't want the image to collapse over time so make sure it is well supported.


Carefully line up the image and stick in place like this.


Repeat this process with the remaining pieces. Start with the largest and end with the smallest.


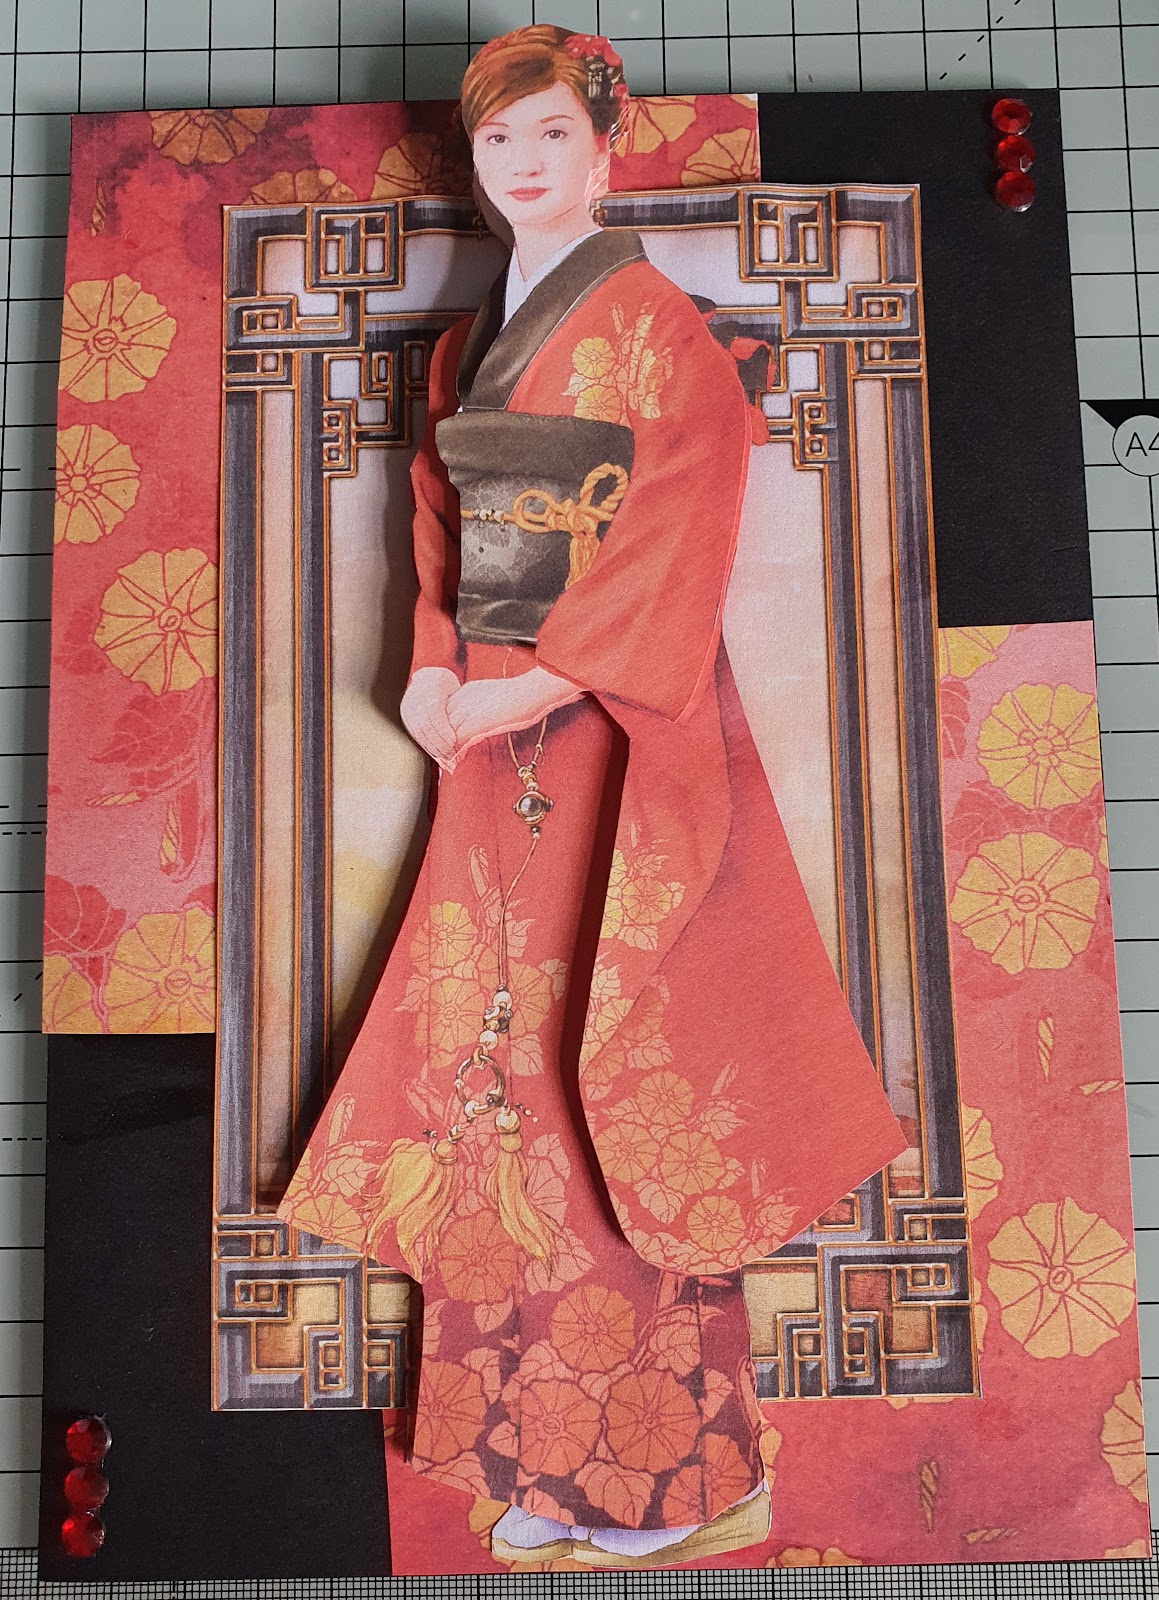
You will end up with a beautiful 3D image like this 


I finished the front of the card with some pretty faux gems.


This design also has a matching insert. Simply fold it in half like this.


Add some adhesive to the front side of the insert. Line it up inside the card. Fold the card in  half press firmly to stick the insert in place.


Because you put the adhesive on the front of the insert it will give a very professional look when you open your card. 

I hope ypu enjoyed this tutorial.

Until next time

Happy Crafting.


Comments

Popular posts from this blog

Making Videos

As you know I am busy getting content onto my YouTube Channel. I have made several videos over the last couple of weeks. I am not 100% comfortable with talking on videos. I am very aware of my very Geordie accent. I also get very nervous and feel like I am stumbling over my words, or in some places I feel there are awkward silences. I have tried making videos with no commentary in them, but they aren't right either. I am hoping I have found the solution to my problem. I have discovered this handy little app. It has enabled me to edit photos together and add text instructions to the pictures. I have been playing with it over the past couple of days, and so far I am impressed. I shall be adding videos made with this app soon. In the meantime if you would like to check out my YouTube Channel  you can find it here  Celticmoon Crafts YouTube Channel Until next time Happy Crafting

How A Scan and Cut Can Help With Your Crafting

1. So, you're interested in buying a Brother Scan and Cut SDX 1200?   The Brother Scan and Cut SDX 1200 is a great machine that can help you with your crafts. If you are interested in buying a Brother Scan and Cut SDX 1200, then you should read this article. In this article, you will learn about the features of the Brother Scan and Cut SDX 1200 and how it can help you with your crafts.   2. Why the Brother Scan and Cut SDX 1200 is perfect for crafters   The Brother Scan and Cut SDX 1200 is an all-in-one device for crafters. Whether you are a professional or just getting started with crafts, the Brother Scan and Cut SDX 1200 is the perfect device for your needs.   Here are some of the features that make this device perfect for crafters:   - Scanning and cutting: The Brother Scan and Cut SDX 1200 comes with a built-in scanner that can scan and identify various shapes and sizes of material. This gives you the ability to create precision cuts for a variety of projec...

Top Tips for Perfect Score Lines

Invest in good scoring board. I have the Ultimate by Crafters Companion. I've been using it for years and it's never let me down yet. There are loads of very good score boards on the market. Do some research, compare diffetent models and pick one that meets your needs and your pocket. Pick a bone folder that meets your needs. Again there are loads on the market. I have a lot of different bone folders I have collected over the years, but my favorite is a Teflon one. It gives a good crease and doesn't mark the card. When you use your bone folder hold it firmly in your hand and use the tip by running it firmly along the fold of your card. I start in the middle of the fold and crease half of the fold and the repeat to form the crease on the second half. Make sure you hold your bone folder at a small low angle. This allows you to apply more pressure as you crease the card. Always score with the grain of the card to get a good crease. If you don't have a score board you can i...